Pedal Past the Parking Lot: A Low-Stakes Bike Strategy for Wild Access
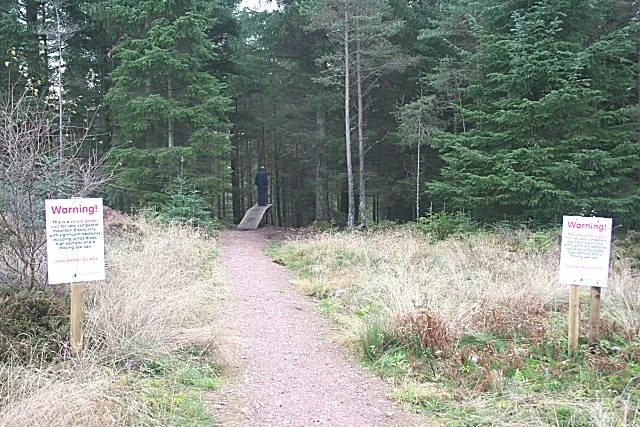
Photo: Anne Burgess, CC BY-SA 2.0, via Wikimedia Commons
There’s a particular kind of frustration that settles in at 7:40 on a Saturday morning, when the trailhead lot is already full and a line of cars is inching around the loop like a slow-motion carousel. You came for quiet. Instead, you’re idling next to a minivan with a paddleboard strapped to the roof. Then someone coasts past on a scratched-up mountain bike, leans it against a signpost, and walks onto the trail without a second glance at the parking chaos.
That’s the beater-bike advantage. Not fitness. Not gear obsession. Just a small, human-powered workaround that turns a crowded access point into a launchpad again.
The bottleneck isn’t the trail
Most public-land access in the U.S. funnels through a handful of paved lots. National forest trailheads, BLM staging areas, popular state park edges — they all concentrate traffic at the same few places. In recent seasons, reservation systems and shuttle queues have become common at the busiest destinations. Those systems exist for good reasons, but they also add friction to a day that should be simple.
A cheap bike doesn’t solve every access problem. It won’t help in a designated Wilderness area, where bikes are prohibited. It won’t help on a road that’s closed for good reason. But it can turn two to six miles of forest road into a warm-up instead of a barrier. That’s often enough to leave the full lot behind and find the quieter edge of the map.
What ‘beater’ should actually mean
A low-stakes rig is not a junk bike. It’s a bike you can lock to a signpost without flinching, drop on its side while you dig for a layer, and leave for a few hours without worrying about resale value. For most trailhead access, you want something simple: a rigid or basic hardtail mountain bike, 26-inch or 27.5-inch wheels, working brakes, and enough gears to spin up a forest road.
Fit matters more than spec. A bike that’s too small will beat up your knees; one that’s too big will feel sketchy on washboard. Flat pedals and an upright bar position are fine. A used rear rack or a frame bag is more useful than fancy suspension you can’t service.
Budget roughly $150 to $400 for the bike, then set aside a little more for a helmet, a basic lock, tubes, a pump, and a simple multitool. Avoid carbon frames, suspension that needs a shop, tubeless setups that haven’t been maintained, and anything that feels like a project if you’re not a mechanic. The point is access, not identity.
Three checks before you hand over cash
When you buy secondhand, keep it practical. First, inspect the frame and fork for cracks, deep dents, or heavy rust, especially around the head tube and bottom bracket. Second, spin the wheels and watch the rims — a little wobble is common, but a wheel that’s badly out of true or has loose spokes is a pass. Third, test the brakes and run through the gears under a little load. A worn chain and tired cables are cheap fixes; a cracked frame is not.
Ask whether the bike has been ridden recently. A bike that’s been sitting for years will likely need tires, tubes, and a tune. That’s fine — just factor it into the price.
Read the road before you read the map
Not every forest road is a good bike road. Check the local Motor Vehicle Use Map for national forest routes, and look at agency websites or local ranger district updates for seasonal closures, washouts, and gate schedules. Washboard is annoying; deep mud is a stop sign. Riding a muddy road widens ruts and damages the surface for everyone. Snow line matters, too — a road that’s clear at the bottom can turn into a slushy mess a thousand feet up.
Think about grade and traffic. A gentle two-track is ideal. A narrow, shoulderless highway with logging trucks is not. Ride early, use front and rear lights, and assume drivers are looking past you rather than at you.
Locking deserves a minute of thought. Carry a simple U-lock or cable and lock to a metal rack or signpost. Don’t lock to trees or block a gate. If there’s no rack, look for a sturdy, legal anchor and keep the bike out of the road. Theft is rare at remote trailheads, but not zero.
A simple bike-to-hike plan
Pick a trailhead that sits two to six miles beyond the main overflow lot. Ride in at an easy pace, lock the bike, change shoes, and hike. On the way back, you get a gentle coast instead of a tense drive out of a packed lot.
Carry a tube, pump, multitool, master link, zip ties, and a light. Bring a layer for the ride and water for both legs of the day. Tell someone your plan. If you’re hiking after the ride, lock your helmet with the bike or carry it — a helmet dangling from a handlebar is an easy thing to forget.
Rules and etiquette still apply
Bikes are not allowed in designated Wilderness areas. E-bike rules vary by agency and trail system, so check before you assume. Yield to hikers and horses, call out before you pass, and don’t skid. If a gate is closed, don’t go around it.
The beater bike isn’t a magic key. It’s a permission slip you buy for a couple hundred bucks. It won’t make you faster, and it won’t impress anyone. It will, however, get you past the parking lot and onto the quieter part of the road — which is usually where the day starts to feel like it belongs to you again.